LTI Toolkit Example - Admin View
Available LTI Tool Consumers
LTI 1.3 Dynamic Registration
Step 1 - Add LTI 1.3 Application to Canvas
This requires administrator access in Canvas. Go to the Admin panel for the account used and find the Developer Keys page, then add a new LTI Registration.
- Registration URL:
https://ltitool.home.russfeld.me/lti/provider/register

Once registration is complete, click "Enable and Close"

Step 2 - Activate Application
Once installed, click the link to View in Canvas Apps, then click Edit and choose Available, then click Save. This will allow it to be used in Canvas courses without installation.

Step 3 - Configure Assignment
In Canvas, configure an LTI assignment as usual.
- Launch URL:
https://ltitool.home.russfeld.me/lti/provider/launch
Manual LTI Consumer Configuration
This will update the Autogenerated LMS with LTI 1.3 Settings.
LTI 1.3 Manual Configuration Steps
Step 1 - Add LTI Application to Canvas
This requires administrator access in Canvas. Go to the Admin panel for the account used and find the Developer Keys page, then add a new LTI Key.
- Redirect URIs:
https://ltitool.home.russfeld.me/lti/provider/launch
- Target Link URI:
https://ltitool.home.russfeld.me/lti/provider/launch
- OpenID Connect Initiation Url:
https://ltitool.home.russfeld.me/lti/provider/login
- JWK Method: Public JWK URL
- Public JWK URL:
https://ltitool.home.russfeld.me/lti/provider/jwks

At a minimum, the "Can create and update submission results for assignments associated with the tool" LTI Advantage Service must be enabled to allow grade passback.

Privacy Level may be set to any value. "Public" provides all user data, "Private" hides most user data.

Once the key is created, make sure it is enabled and note the Client ID provided (e.g. "10000000000004")

Once saved, make sure the LTI application is enabled.
Step 2 - Add or Activate Application
The application can either be activated globally for one or more courses, or must be installed manually into individual courses. Global activation is preferred since it only has to be configured once.
Step 2A - Activate Application
Once installed, click the link to View in Canvas Apps, then click Edit and choose Available, then click Save. This will allow it to be used in Canvas courses without installation.
The Deployment ID can be found on this page as well. This will be needed in the next step.

Step 2B - Add LTI Application in Course
Alternatively, the teacher of the course must add the LTI application to the course. This can be found in the Settings of the course on the Apps tab. Click the button to add a new application, select "By Client ID" and enter the Client ID from the previous step.

Once added, click the menu next to the application to view the Deployment ID. This will be needed in the next step.

Step 3 - Configure LTI 1.3 Settings in LTI Demo Application
On the top of this page in the LTI Demo Application, enter the settings for your LMS using information provided above. Default URLs are shown for the Canvas LMS hosted at the URL provided in the environment file.
- LTI 1.3 Client ID: From Step 1 (e.g. "10000000000004")
- LTI 1.3 Platform ID: Usually the URL of the LMS
- LTI 1.3 Deployment ID: From Step 2
- LTI 1.3 JWKS Keyset URL: For Canvas, /api/lti/security/jwks
- LTI 1.3 Token URL: For Canvas, /login/oauth2/token
- LTI 1.3 Auth URL: For Canvas, /api/lti/authorize_redirect

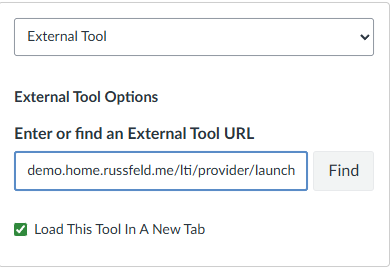
Step 4 - Configure Assignment
In Canvas, configure an LTI assignment as usual.
- Launch URL:
https://ltitool.home.russfeld.me/lti/provider/launch